Creating an Agent
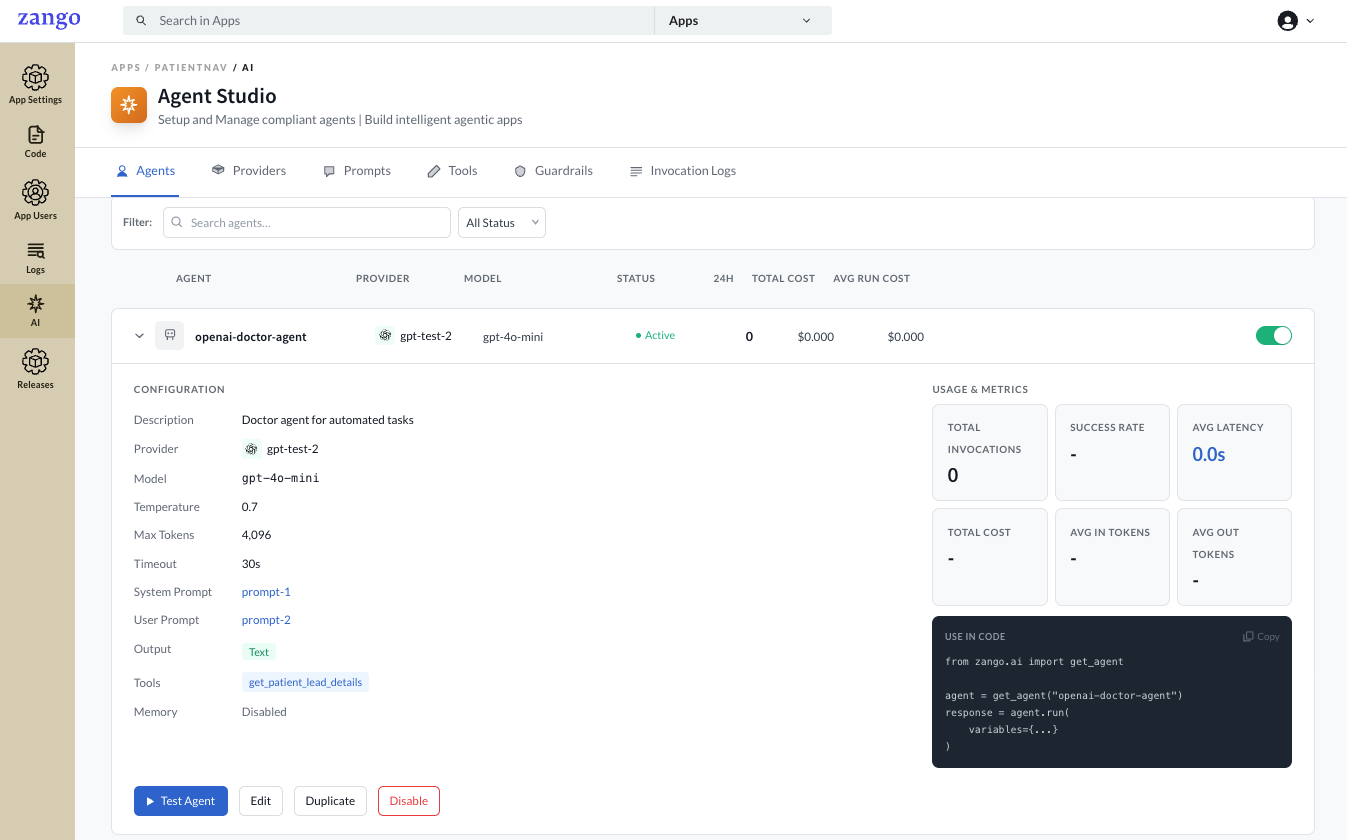
An Agent is a named, configurable LLM persona that combines a provider, prompts, model settings, and tools. Agents are managed per tenant in the App Panel and are referenced by name in your application code.
Creating an Agent
Go to App Panel → your app → AI → Agents.
Click Add Agent.
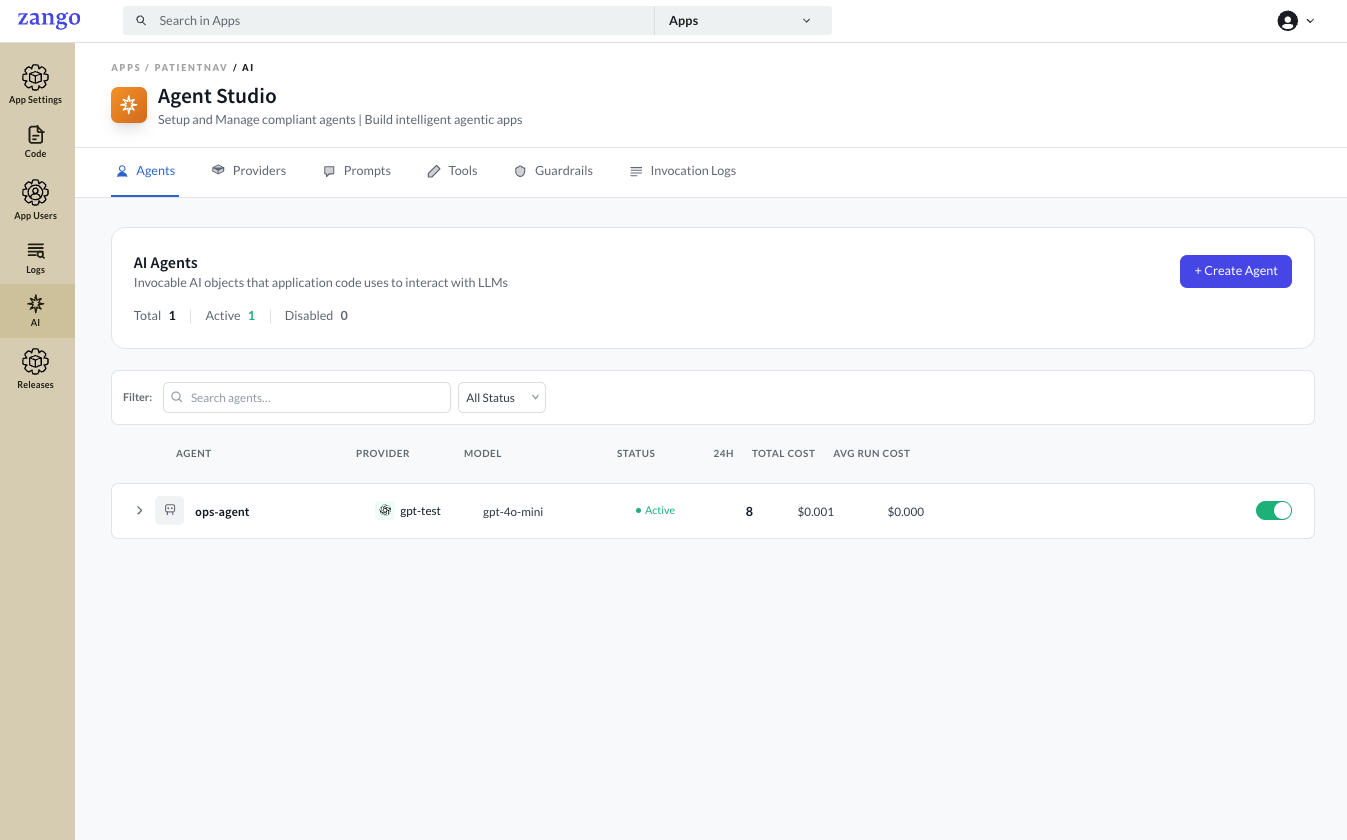
Fill in the configuration:
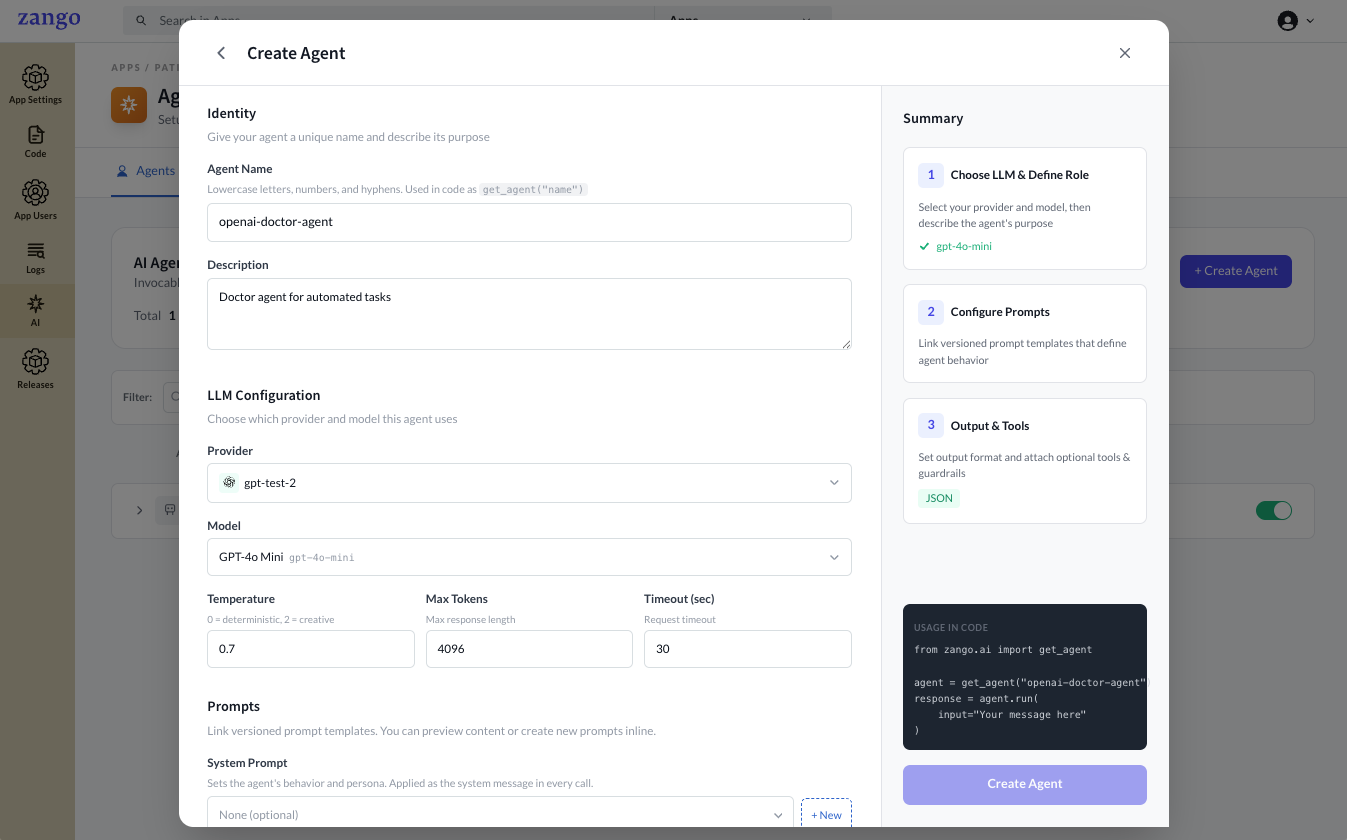
Basic Settings
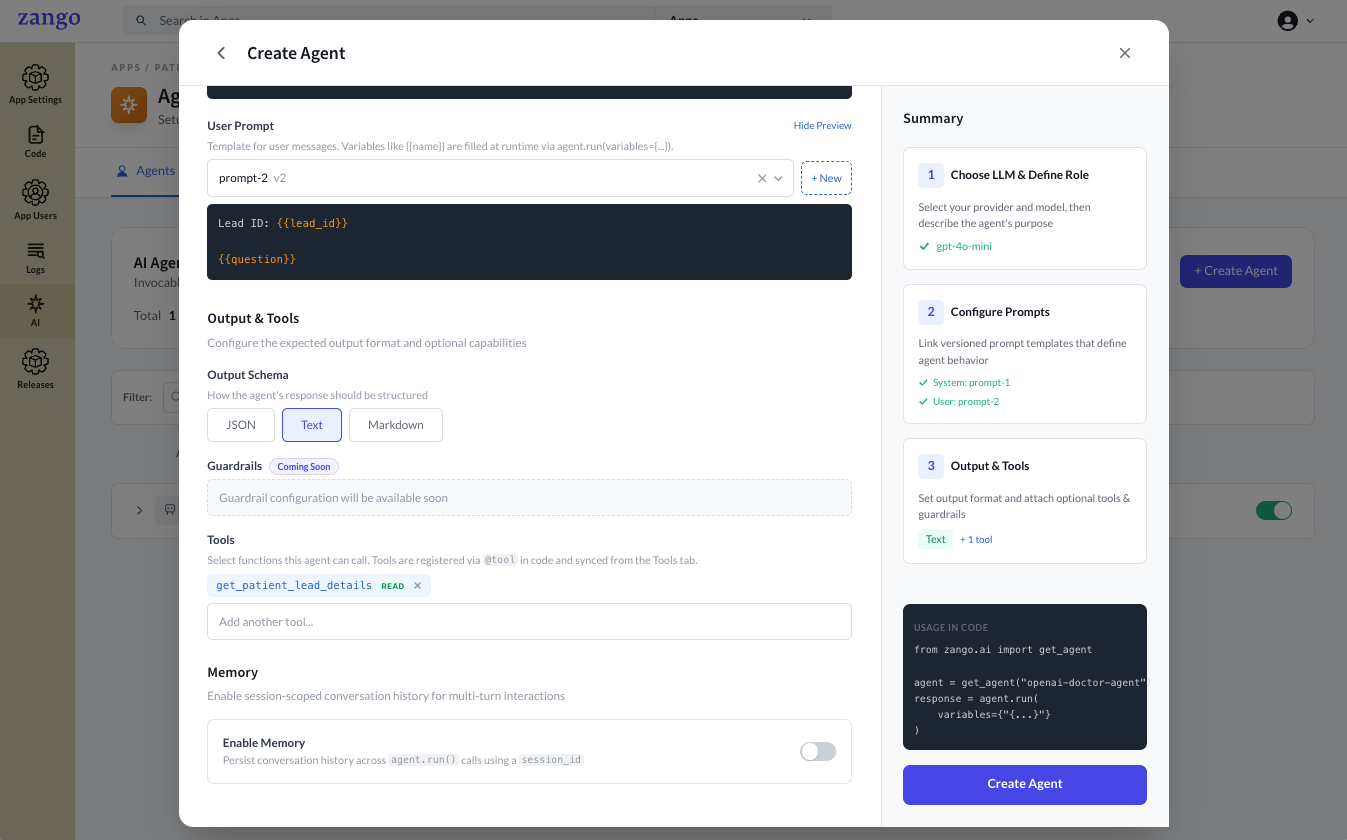
Field Description Name A unique slug used to look up the agent in code (e.g. patient-summary-agent). Must be unique within the tenant.Description Internal description of what this agent does. Provider Select the LLM provider configured in the previous step. Model The specific model to use (e.g. gpt-4o-mini,claude-3-5-sonnet).Temperature Controls randomness. 0.0is deterministic;1.0is creative. Default:0.7.Max Tokens Maximum tokens in the response. Default: 2000.Output Schema Textfor plain text responses;JSONif you need structured output (see JSON Output Schema below).Short-term Memory Enable to retain conversation history across multiple agent.run()calls within the same session. Set Max Messages to control the sliding window of message pairs loaded per call (default: 20).Prompts
Select the prompts to attach to this agent. A prompt defines the system or user instructions sent to the model on every run. Prompts can be created beforehand or attached later by editing the agent.
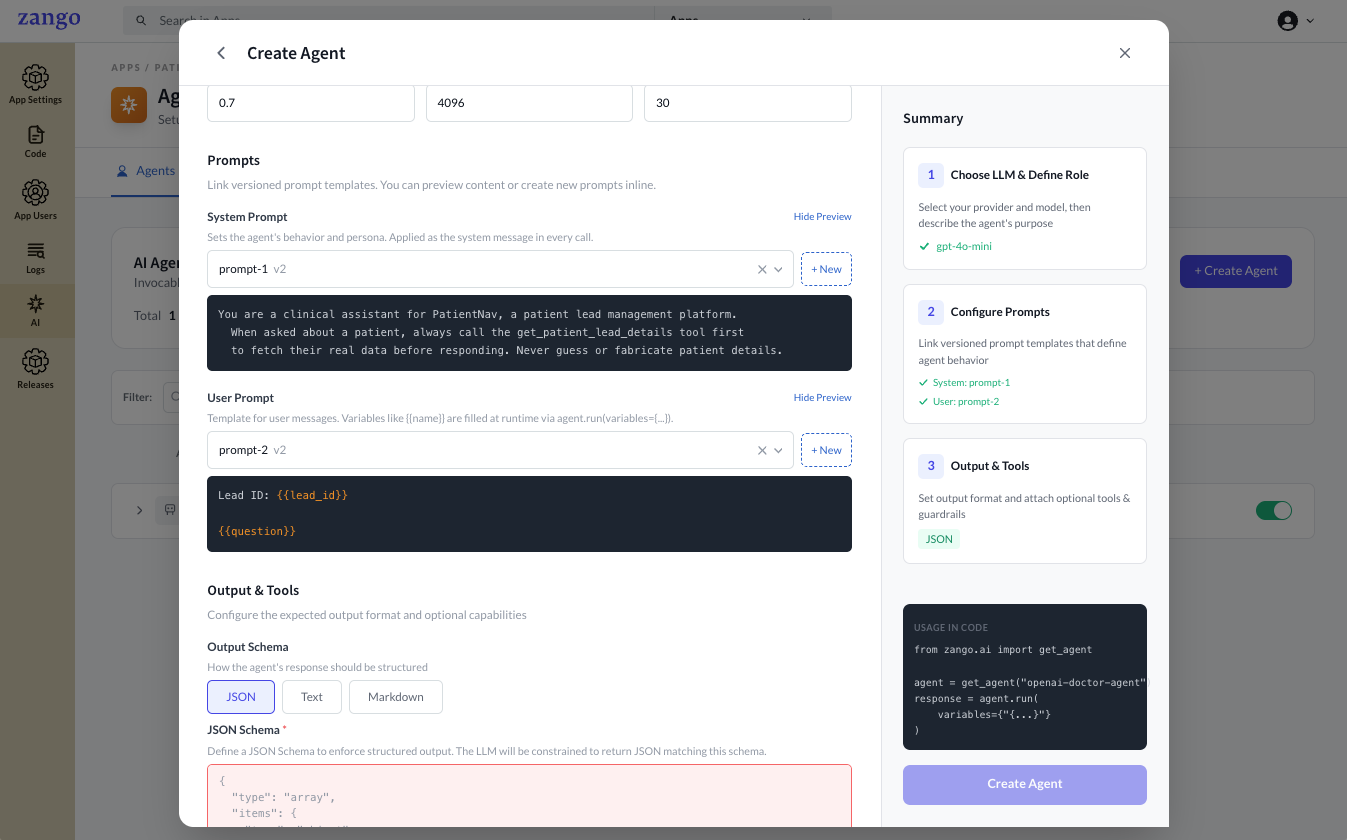
Tools
Select the tools this agent is allowed to call. Tools can be defined and synced beforehand or attached later by editing the agent.
Click Create Agent.
JSON Output Schema
When Output Schema is JSON, you must supply a schema. Rules differ by provider and are mentioned below.
- OpenAI
- Anthropic
Three strict requirements apply:
- Every
objectneeds"additionalProperties": false - Every property must be in
required - Nullable fields use
anyOf— not{"type": ["string", "null"]}.
{
  "type": "object",
  "additionalProperties": false,
  "required": ["summary", "is_urgent", "tags", "assigned_to"],
  "properties": {
    "summary":     { "type": "string" },
    "is_urgent":   { "type": "boolean" },
    "tags":        { "type": "array", "items": { "type": "string" } },
    "assigned_to": { "anyOf": [{ "type": "string" }, { "type": "null" }] }
  }
}
Standard JSON Schema — no strict rules. Optional properties, shorthand nullable types, and objects without additionalProperties are all accepted.
{
  "type": "object",
  "properties": {
    "summary":     { "type": "string" },
    "is_urgent":   { "type": "boolean" },
    "tags":        { "type": "array" },
    "assigned_to": { "type": ["string", "null"] }
  }
}
Referencing the Agent in Code
The Name field you set is the identifier used to look up this agent in your application code via get_agent("your-agent-name").
For the full range of ways to call an agent — with plain text, prompt variables, file attachments, memory sessions, JSON output, and background tasks — see Running Agents.
If the name does not match exactly (case-sensitive), get_agent() raises AgentNotFound. The agent must also be enabled for it to be found.
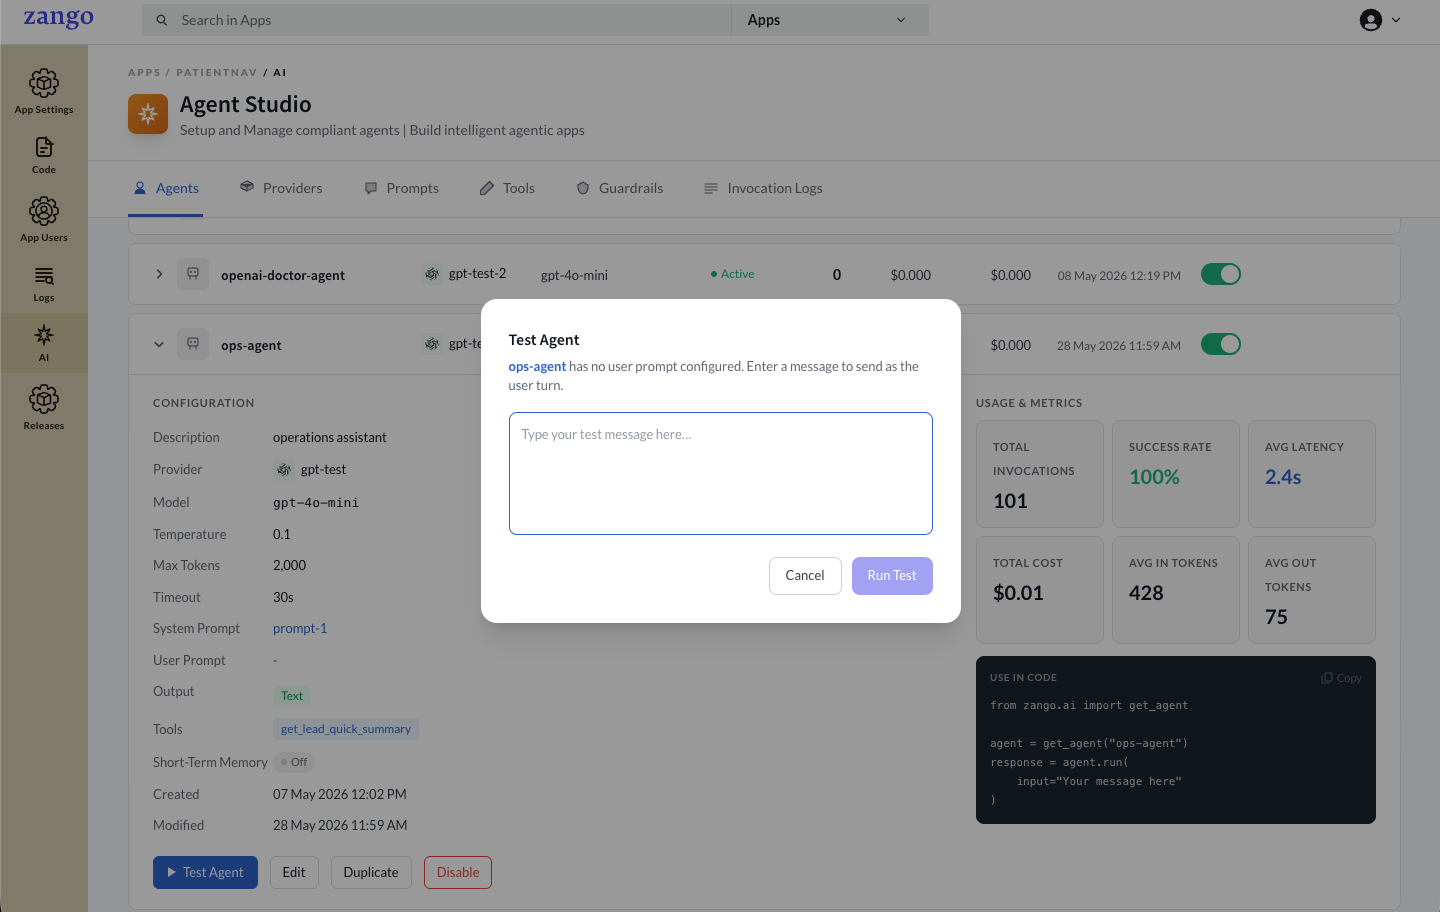
Testing an Agent
You can run a quick test directly from the App Panel without writing any code.
- Go to App Panel → your app → AI → Agents.
- Click the Test button on any agent row. A test modal opens.
The test modal includes:
- System Prompt Variables — if the agent's system prompt contains
{{placeholders}}, an input field appears for each variable. - User Prompt Variables — if the agent's user prompt contains
{{placeholders}}, an input field appears for each variable. - File upload — attach one or more files (images, PDFs, documents) to include in the test run.
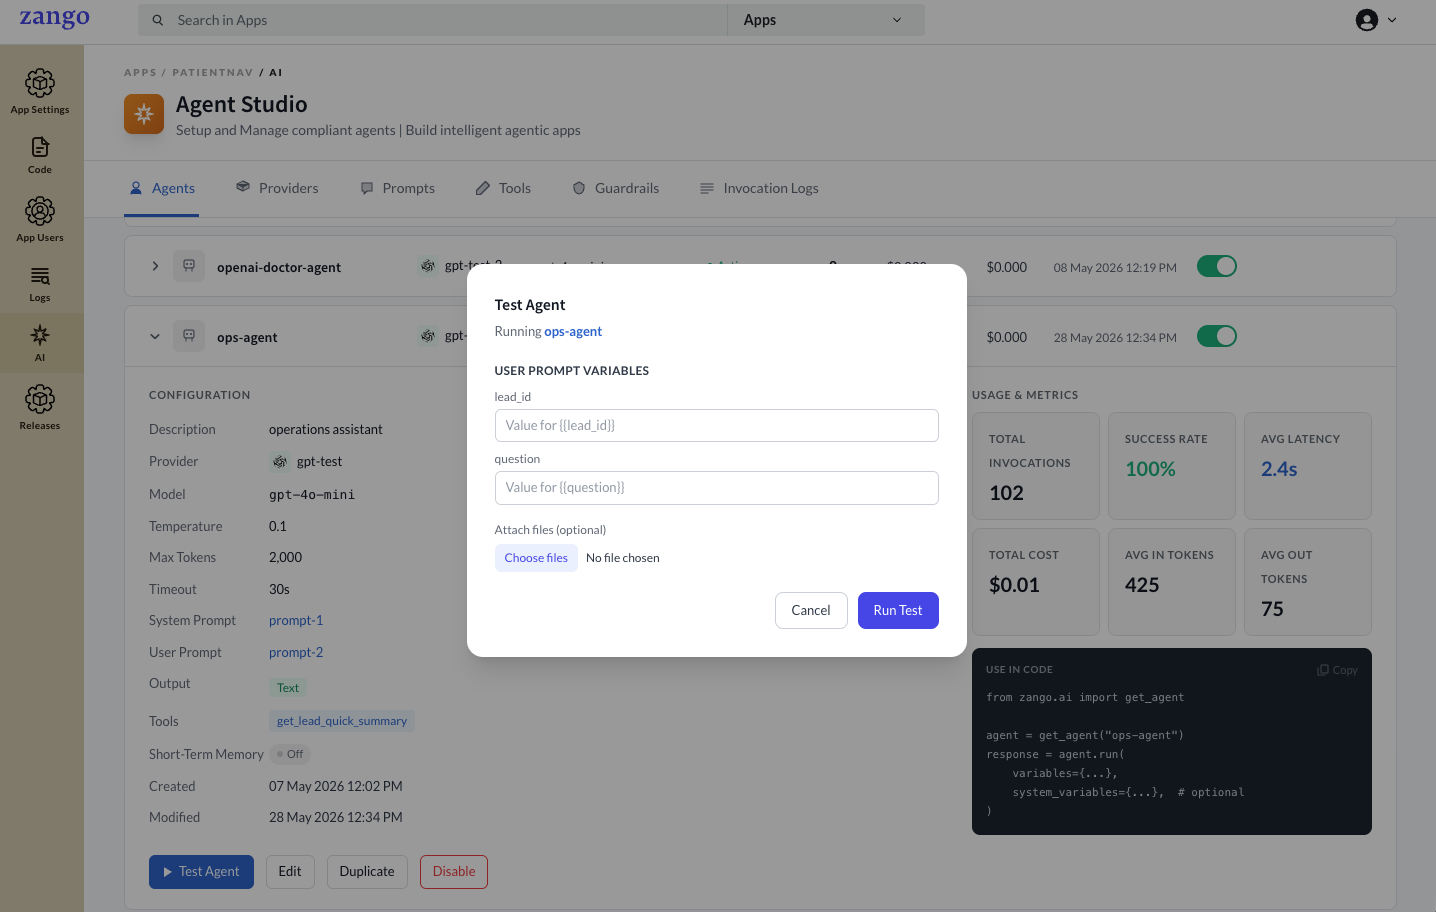
- Message input — only shown when the agent has no user prompt configured. Type a message to use as the user input.
The Result of the Agent Test Run is displayed in the modal like below
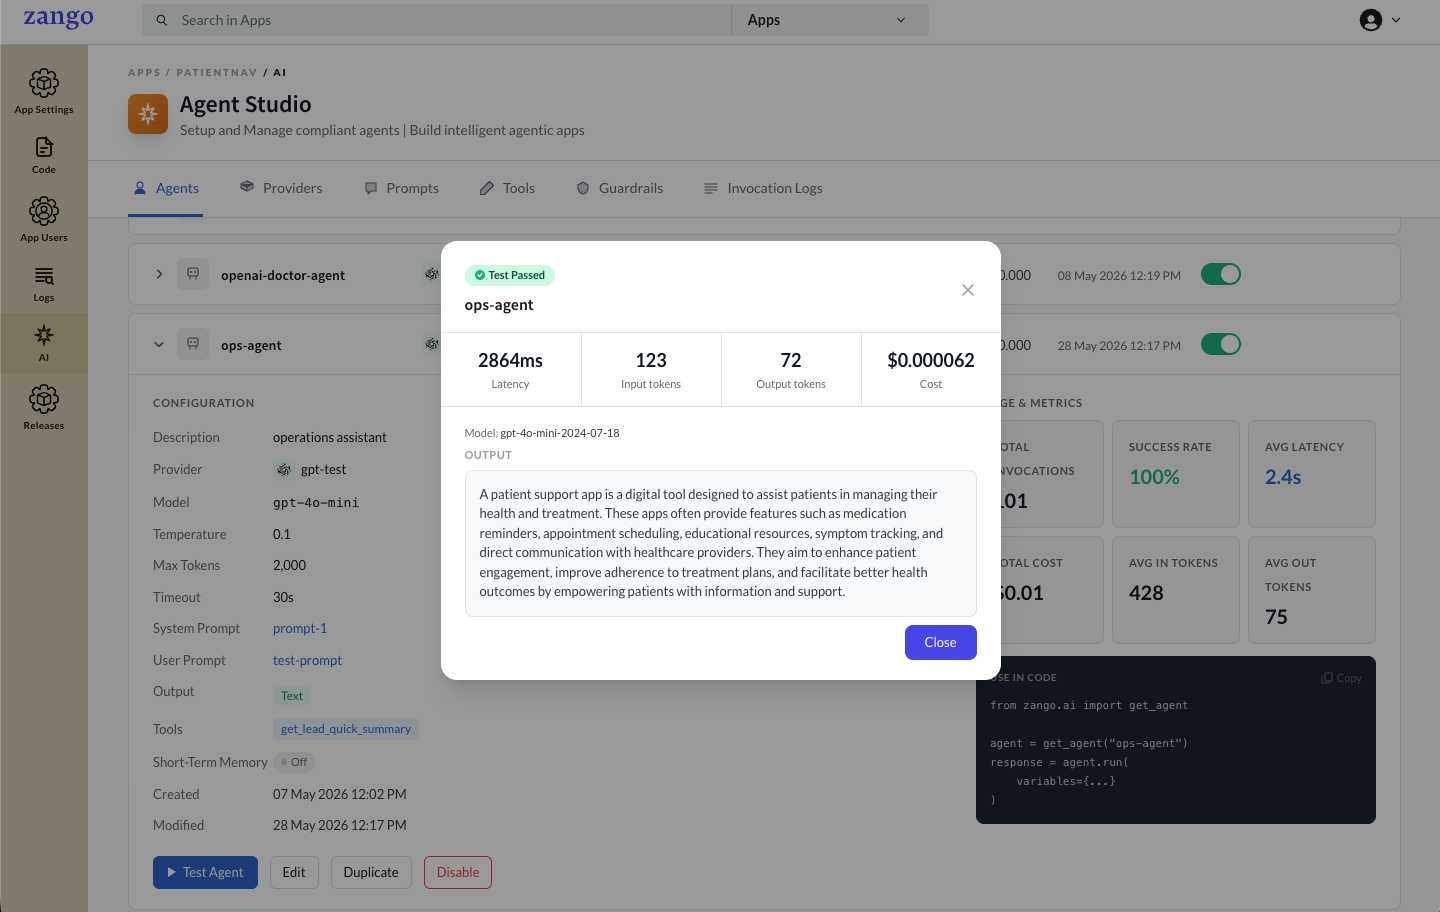
The test result modal shows:
- The LLM's response (up to 2000 characters)
- Latency in milliseconds
- Input and output token counts
Test runs are real invocations — they are logged in Invocation History and accrue cost against the provider.
Editing and Deactivating Agents
Agents can be edited at any time from the agents list. Deactivating an agent prevents get_agent() from resolving it without changing any code.
Next Steps
With an agent created, create prompts and attach them to it, then define tools your agent can call.